


Introduction
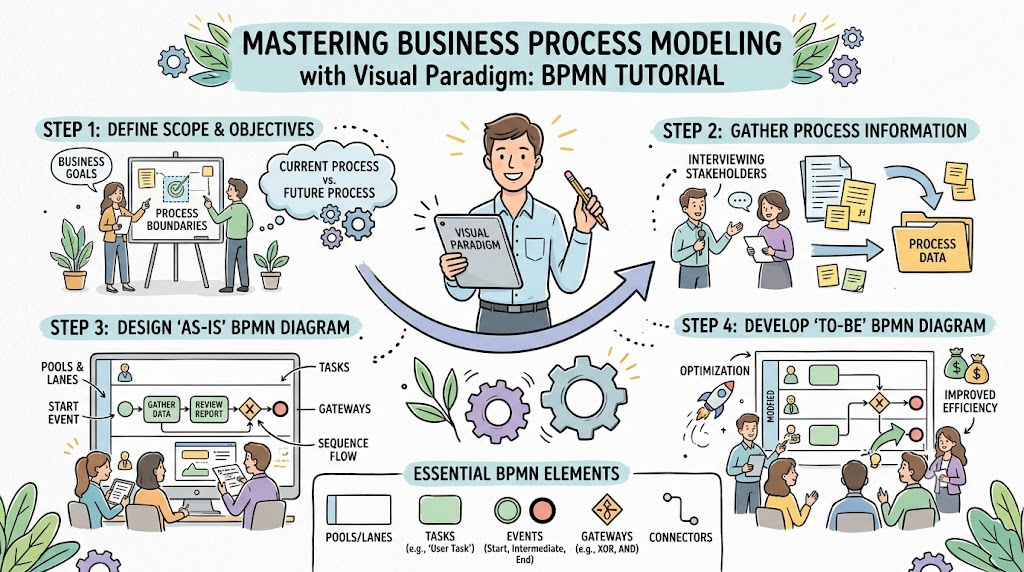
In today’s fast-paced business environment, understanding and optimizing workflows is critical for organizational success. Business Process Modeling (BPM) serves as a powerful technique to visualize, analyze, and improve how work gets done within an organization. By representing business activities, information flows, and decision logic in a clear visual format, BPM enables stakeholders to communicate effectively, identify bottlenecks, and drive continuous improvement.
This comprehensive tutorial will guide you through the fundamentals of business process modeling using Visual Paradigm, a robust platform in the Visual Paradigm ecosystem. Whether you’re a business analyst, process owner, or project manager, you’ll learn how to create professional-grade Business Process Model and Notation (BPMN) diagrams that capture both current (“as-is”) and future (“to-be”) states of your processes. We’ll walk through practical steps, from defining your scope to building detailed diagrams with pools, lanes, tasks, gateways, and events—all within the intuitive Visual Paradigm interface.
What is Business Process Modeling?
Business process modeling represents three core elements:
-
Business activities – The specific actions or tasks performed within a process
-
Information flow – How data and documents move between participants
-
Decision logic – The rules and conditions that determine process paths
With the power of visualization, BPM is used to communicate information regarding a process and the interactions it includes within or between organizations. This communication benefits both the persons reading a model and the persons who create it, ensuring alignment and shared understanding across teams.
Steps to Create a Business Process
Before diving into the tooling, it’s essential to understand the foundational steps involved in creating a business process model. These steps provide a structured approach to ensure your diagram accurately reflects reality and serves its intended purpose.
1. Define the Process You Are Modeling
Clearly define the process within your scope of business operation. Ask yourself: What process are we modeling? What are we trying to achieve? Establishing clear boundaries and objectives upfront prevents scope creep and ensures focus.
2. Identify the Starting Point of the Process
Determine what triggers the process. Is it a customer request, a scheduled event, or an internal notification? Identifying the start event helps anchor your diagram.
3. Identify the Different Steps in the Process
Break down the process into discrete activities or tasks. List them in chronological order, noting any parallel activities or dependencies.
4. Clarify Who or What Performs Each Step
Assign responsibility for each task. This could be a person, a role, a department, or even an automated system. This clarity is crucial for accountability and process ownership.
5. Decide Which Type of Modeling Notation to Use
Choose an appropriate notation standard. BPMN (Business Process Model and Notation) is widely recognized and supported by tools like Visual Paradigm, making it an excellent choice for most business scenarios.
Business Process Diagram for Process Improvement
One of the most valuable applications of business process modeling is driving process improvement. To perform business process improvement effectively, follow these additional gap analysis steps:
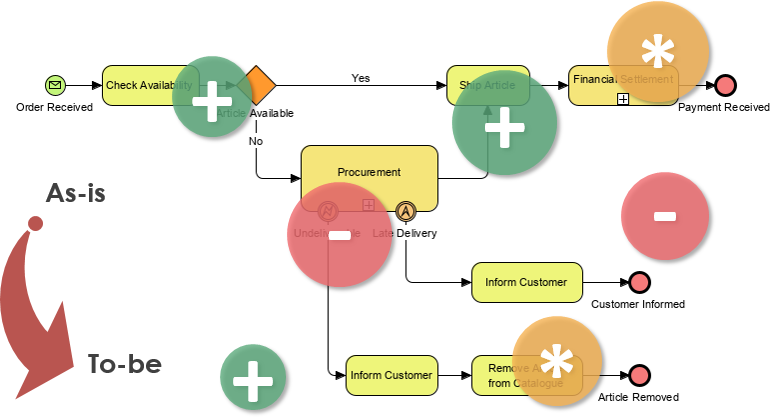
1. Create an As-Is Model (The Now State)
Document the current state of the process exactly as it exists today, including all inefficiencies, workarounds, and pain points. This baseline provides an honest view of reality.
2. Design the To-Be Model (The Future State)
Envision and design the ideal future state of the process. Consider best practices, automation opportunities, and stakeholder feedback to create an optimized workflow.
3. Perform the Gap Analysis
Compare the as-is and to-be models to identify gaps, differences, and improvement opportunities. Highlight areas where changes are needed, such as eliminated steps, new approvals, or automated tasks.
4. Formulate Improvement Actions
Develop a concrete action plan to bridge the gap between the current and future states. Prioritize initiatives based on impact, effort, and resource availability.
Performing Business Process Modeling in Visual Paradigm
Now let’s dive into the practical steps of creating a business process diagram using Visual Paradigm. For this tutorial, we’ll model a Leaving Application Process as our example.
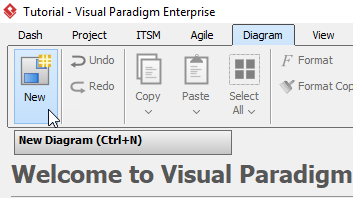
Step 1: Create a New Diagram
Select Diagram > New from the toolbar.
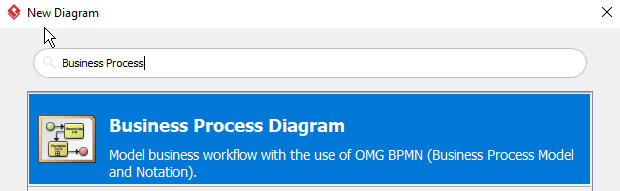
Step 2: Select Business Process Diagram
In the New Diagram window, choose Business Process Diagram, then click Next. You can use the search bar above to filter the result.
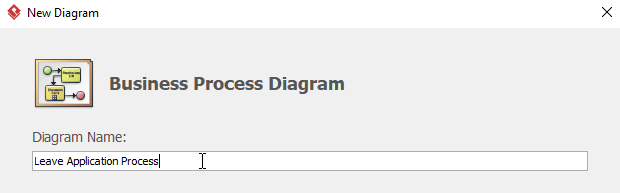
Step 3: Name Your Diagram
Name the diagram, then click OK. In this tutorial, we are naming the diagram Leaving Application Process.
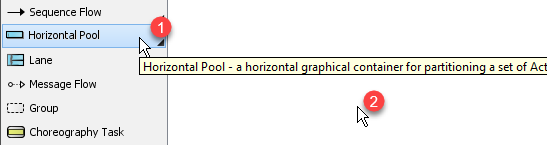
Step 4: Create a Horizontal Pool
Create a horizontal pool by first clicking Horizontal Pool, then click on any empty space on the diagram.
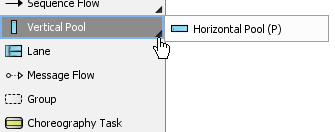
If you cannot find Horizontal Pool but Vertical Pool instead, click the small triangle next to Vertical Pool, or press P on your keyboard.
Step 5: Rename the Pool
Rename the pool by double-clicking the pool. For example, you might name it “ABC Company” to represent the organization.
Step 6: Disable Auto Stretch (Optional)
The Auto Stretch setting of every pool is On by default, which means the length of the pool will stretch along the diagram. However, we don’t want this in the tutorial. We can disable Auto Stretch by right-clicking ABC Company > Presentation Options > Auto Stretch > Off.
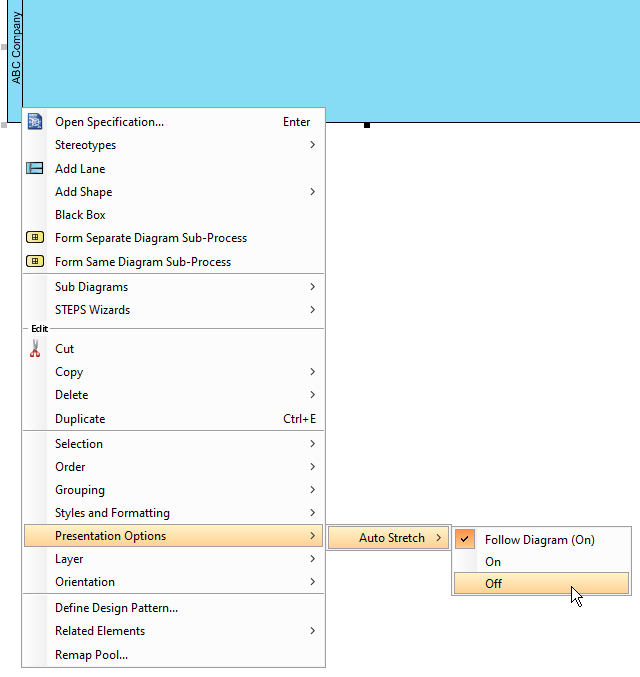
Step 7: Add Lanes
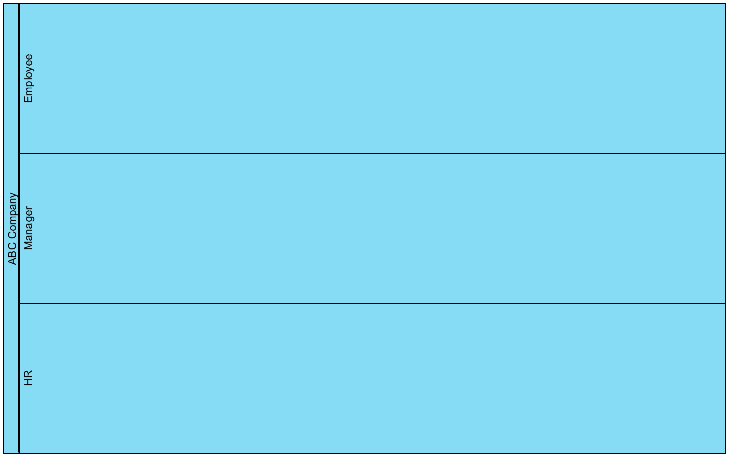
To create a lane, click ABC Company’s empty space, then press the resource button Add Lane. You can rename the lane by double-clicking the lane. Lanes typically represent different roles, departments, or participants in the process (e.g., Employee, Manager, HR).
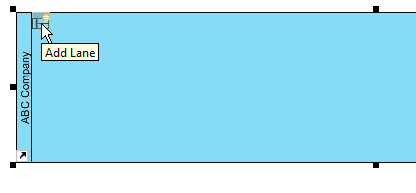
Step 8: Add Additional Lanes
Repeat step 7 for more lanes. You will see something like this after you have created all lanes:
Step 9: Create a Start Event
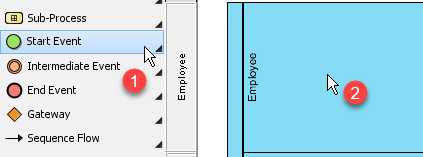
To create a start event, select Start Event, then click the lane you want the start event to be placed. We will place the start event on the Employee lane in this tutorial.
Step 10: Create the First Task
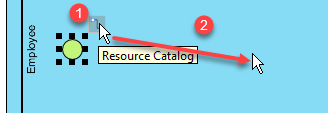
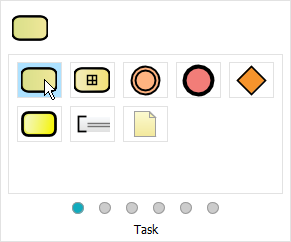
To create the first task, click the start event, then click and hold the resource button Resource Catalog, drag the cursor to the desired position and release. When you see a popup window appears, click Task on the window.
Step 11: Rename the Task
Double-click the task to rename the task. We are renaming the task we created at step 10 to Fill-in the Leave Application Form in this tutorial.
Step 12: Add More Tasks
Repeat steps 10 and 11 for more tasks. Continue building out the sequence of activities in your process.
Step 13: Create a Gateway
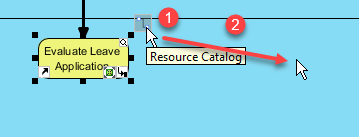
To create a gateway, first click the task you want to be followed by a gateway, click the resource button Resource Catalog, drag the cursor to the desired position and release. Finally, select Gateway from the popup window. In this tutorial, we will be creating a gateway after the task Evaluate Leave Application. You can then rename the gateway using step 11.
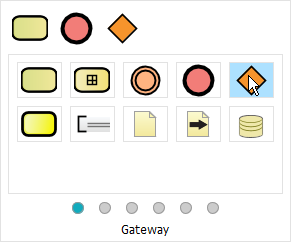
Gateways represent decision points in your process, such as approvals, conditional branches, or parallel paths.
Step 14: Add More Gateways
Repeat step 13 for more gateways as needed to capture all decision logic in your process.
Step 15: Name Sequence Flows
You may want to give some sequence flows a name to clarify the conditions or outcomes they represent. You can achieve this by double-clicking the sequence flow. For example, you might label flows as “Approved” or “Rejected.”
Step 16: Create End Events
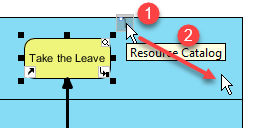
When all tasks and gateways are created, you can create the end events. To create an end event, click the event you would like to end with (Take the Leave in this example), click and hold the resource button Resource Catalog, drag the cursor to the desired position and release, then select End Event from the popup window.
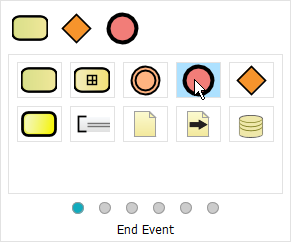
Step 17: Add More End Events
Create more end events by repeating step 16. A process may have multiple end points depending on different outcomes (e.g., leave approved, leave rejected, leave postponed).
Step 18: Review Your Completed Diagram
Once you have finished your diagram, you will see something like this:
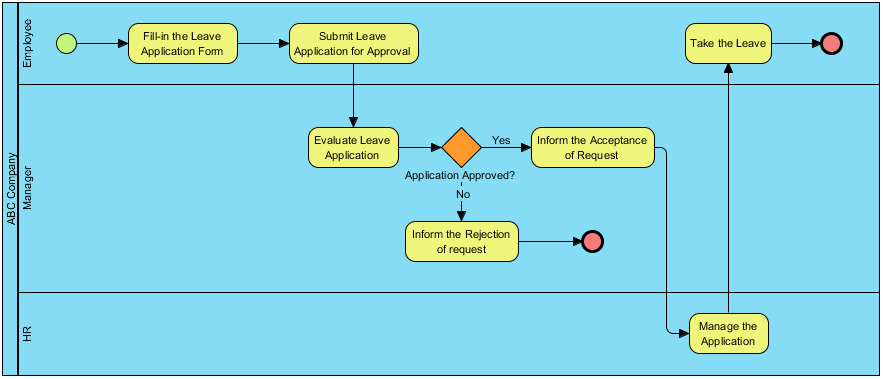
Your completed diagram should clearly show the flow from start to finish, with all participants, tasks, decisions, and outcomes properly represented.
Best Practices for Effective Business Process Modeling
To maximize the value of your BPM efforts, consider these best practices:
-
Keep it simple: Avoid overcomplicating diagrams. Focus on clarity and readability.
-
Use consistent naming conventions: Ensure tasks, gateways, and flows are named consistently and descriptively.
-
Validate with stakeholders: Review your diagrams with process participants to ensure accuracy and completeness.
-
Iterate and refine: BPM is an iterative process. Continuously refine your models as you gather feedback and insights.
-
Leverage Visual Paradigm features: Take advantage of collaboration tools, version control, and integration capabilities within the Visual Paradigm ecosystem.
Conclusion
Business process modeling is an indispensable skill for anyone involved in process improvement, business analysis, or organizational transformation. By following the structured approach outlined in this tutorial—from defining your scope and identifying process steps to building detailed BPMN diagrams in Visual Paradigm—you can create clear, actionable models that drive real business value.
Visual Paradigm provides a powerful and user-friendly platform for creating professional-grade business process diagrams. Its intuitive interface, comprehensive BPMN support, and robust feature set make it an ideal choice for teams looking to visualize, analyze, and optimize their workflows. Whether you’re documenting current processes, designing future states, or performing gap analysis, Visual Paradigm equips you with the tools needed to succeed.
Remember that business process modeling is not just about creating diagrams—it’s about fostering understanding, enabling collaboration, and driving continuous improvement. Start small, iterate often, and always keep the end goal in mind: creating processes that are efficient, effective, and aligned with your organization’s strategic objectives.
Now that you’ve mastered the basics, it’s time to put your skills into practice. Choose a process in your organization, map it out using Visual Paradigm, and begin your journey toward process excellence.
Related posts:
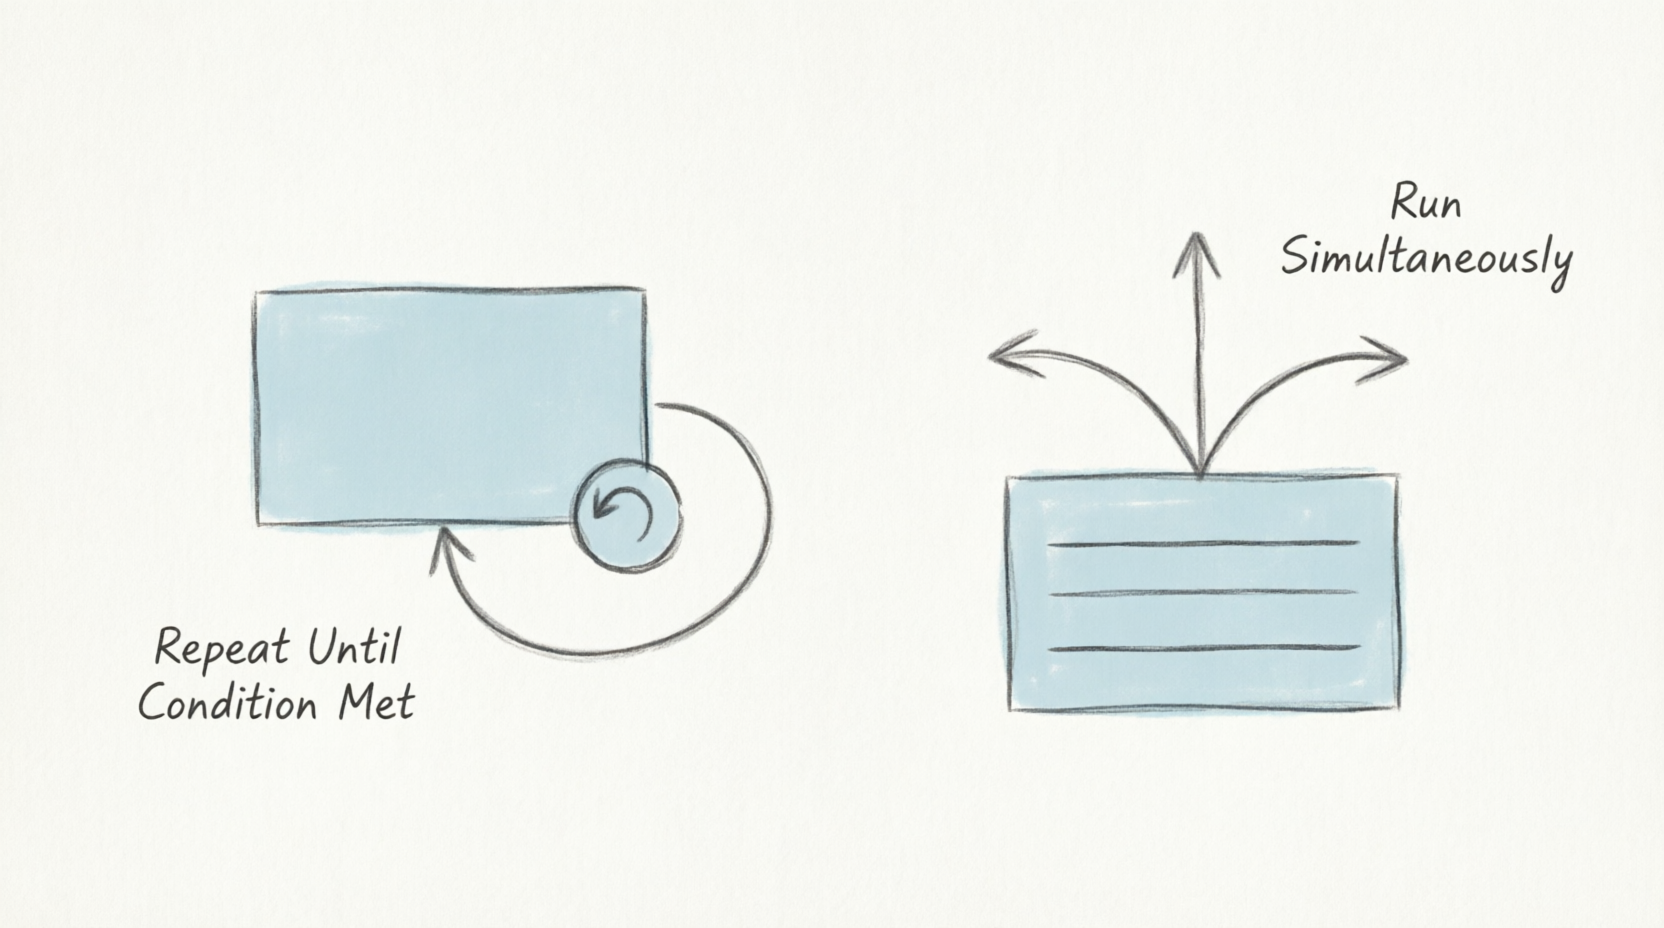 Mastering Repetition in BPMN: A Practical Guide to Loops and Multi-Instance Activities
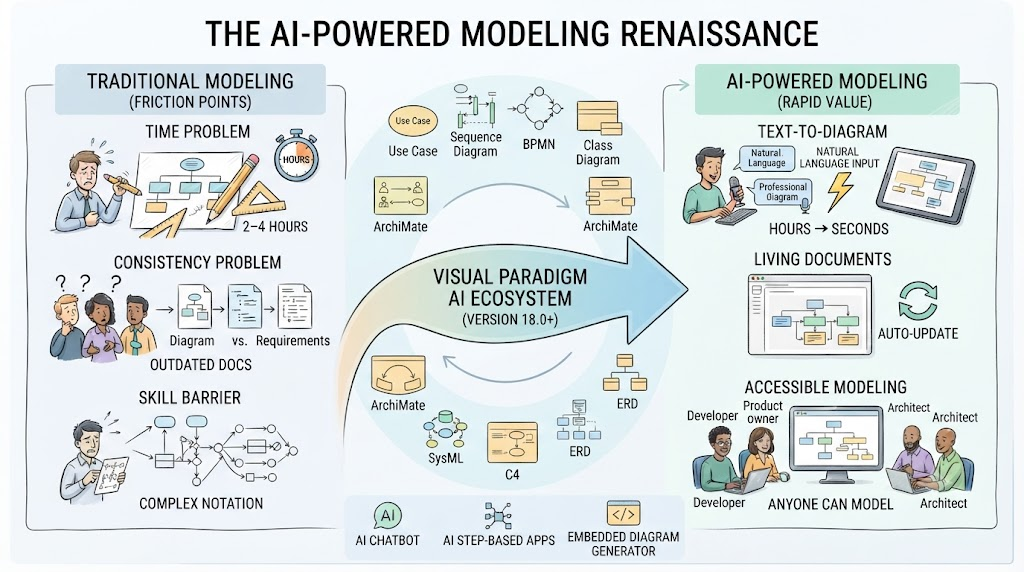 AI-Powered Modeling in Agile: How BPMN and UML Are Making a Comeback
 Step-by-Step Guide: Mapping Employee Onboarding Workflows with AI
 🛒 From Cart to Confirmation: A Beginner’s Complete Guide to BPMN Using Visual Paradigm Online’s Free Web-Shop Workflow

 English
 Arabic
 Chinese (Simplified)
 Dutch
Dutch French
 German
 Italian
 Japanese
 Korean
 Portuguese
 Russian
 Spanish