


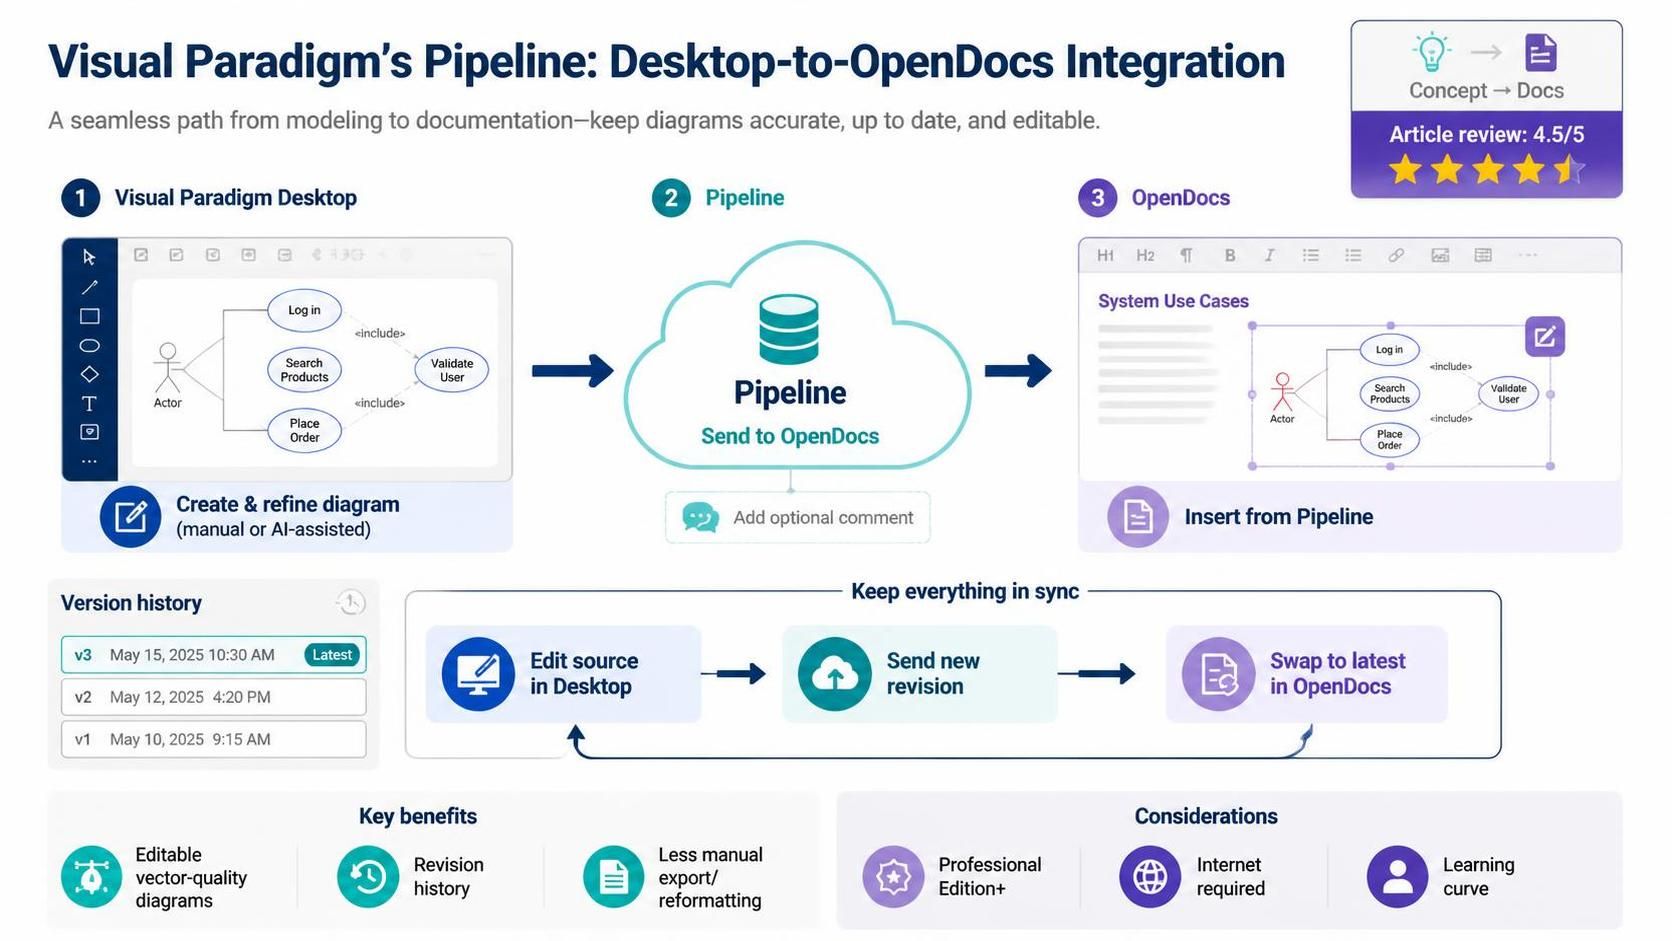
Visual Paradigm’s Pipeline connects diagrams created in Visual Paradigm Desktop with documentation in OpenDocs. Instead of exporting a diagram as a static image and uploading it manually, you send it to the Pipeline, then insert it into an OpenDocs page. The result is a diagram embedded in context and available for later updates.
How the workflow fits together
Think of the process as three stages:
-
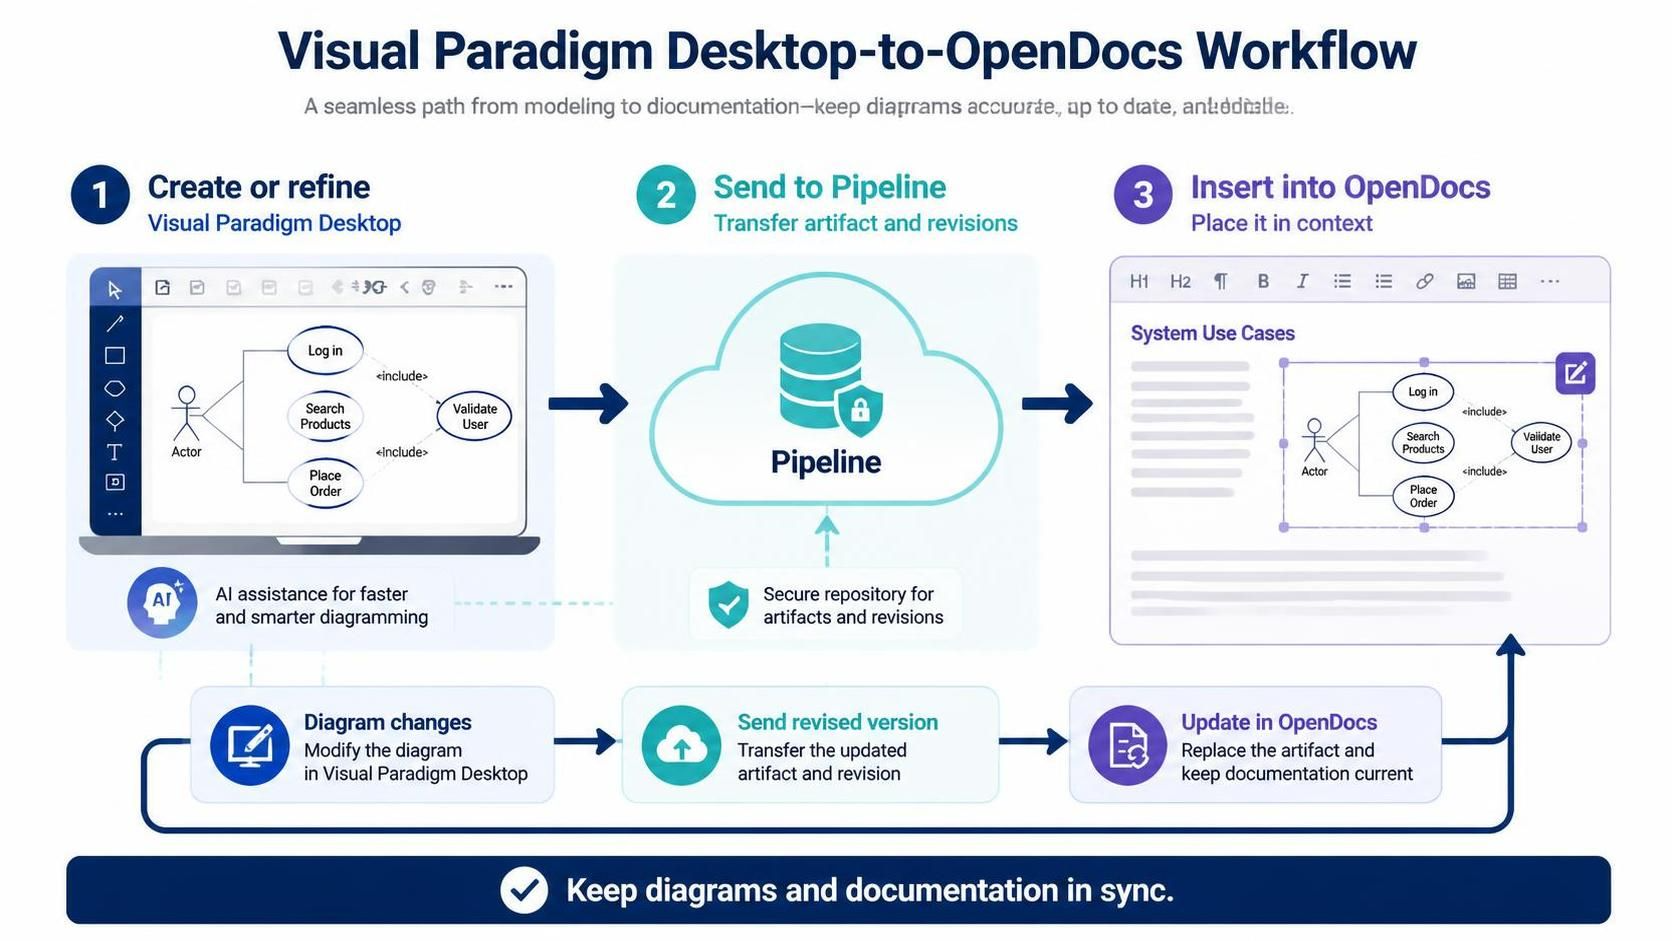
Create or refine a diagram in Visual Paradigm Desktop. You can build it yourself or start with an AI-generated diagram and edit it.
-
Send it to the Pipeline, Visual Paradigm’s repository for transferring artifacts between its tools.
-
Insert it into OpenDocs, where it appears within a document page.
When the source diagram changes, send the revised version through the Pipeline and update the diagram used in the document. This helps keep technical writing and visual models aligned without repeating the whole export-and-upload cycle.
Send a diagram from Desktop
-
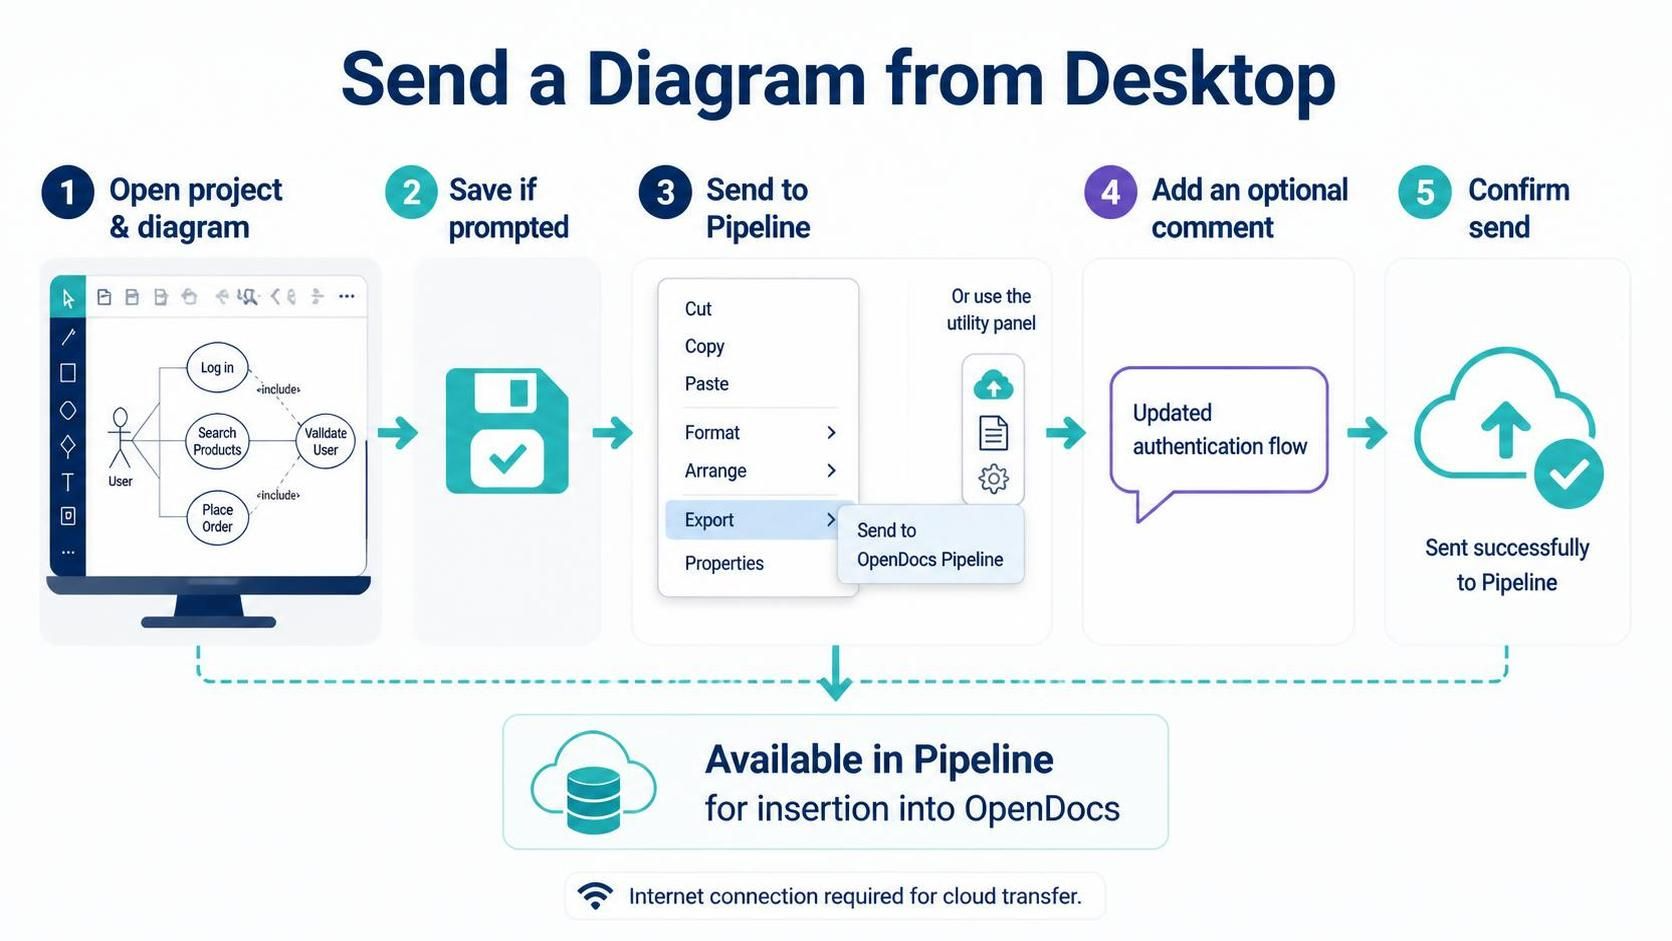
Open the project and diagram you want to document in Visual Paradigm Desktop.
-
Save the project if prompted.
-
Right-click the diagram and choose Export > Send to OpenDocs Pipeline. The article also describes a right-side utility panel as a way to access the send action.
-
Add an optional comment. A short note such as “Updated authentication flow” can help distinguish the artifact or explain what changed.
-
Confirm the send action.
The diagram is then available in the Pipeline for insertion into OpenDocs. The workflow requires an internet connection for the cloud transfer.
Insert the diagram into OpenDocs
-
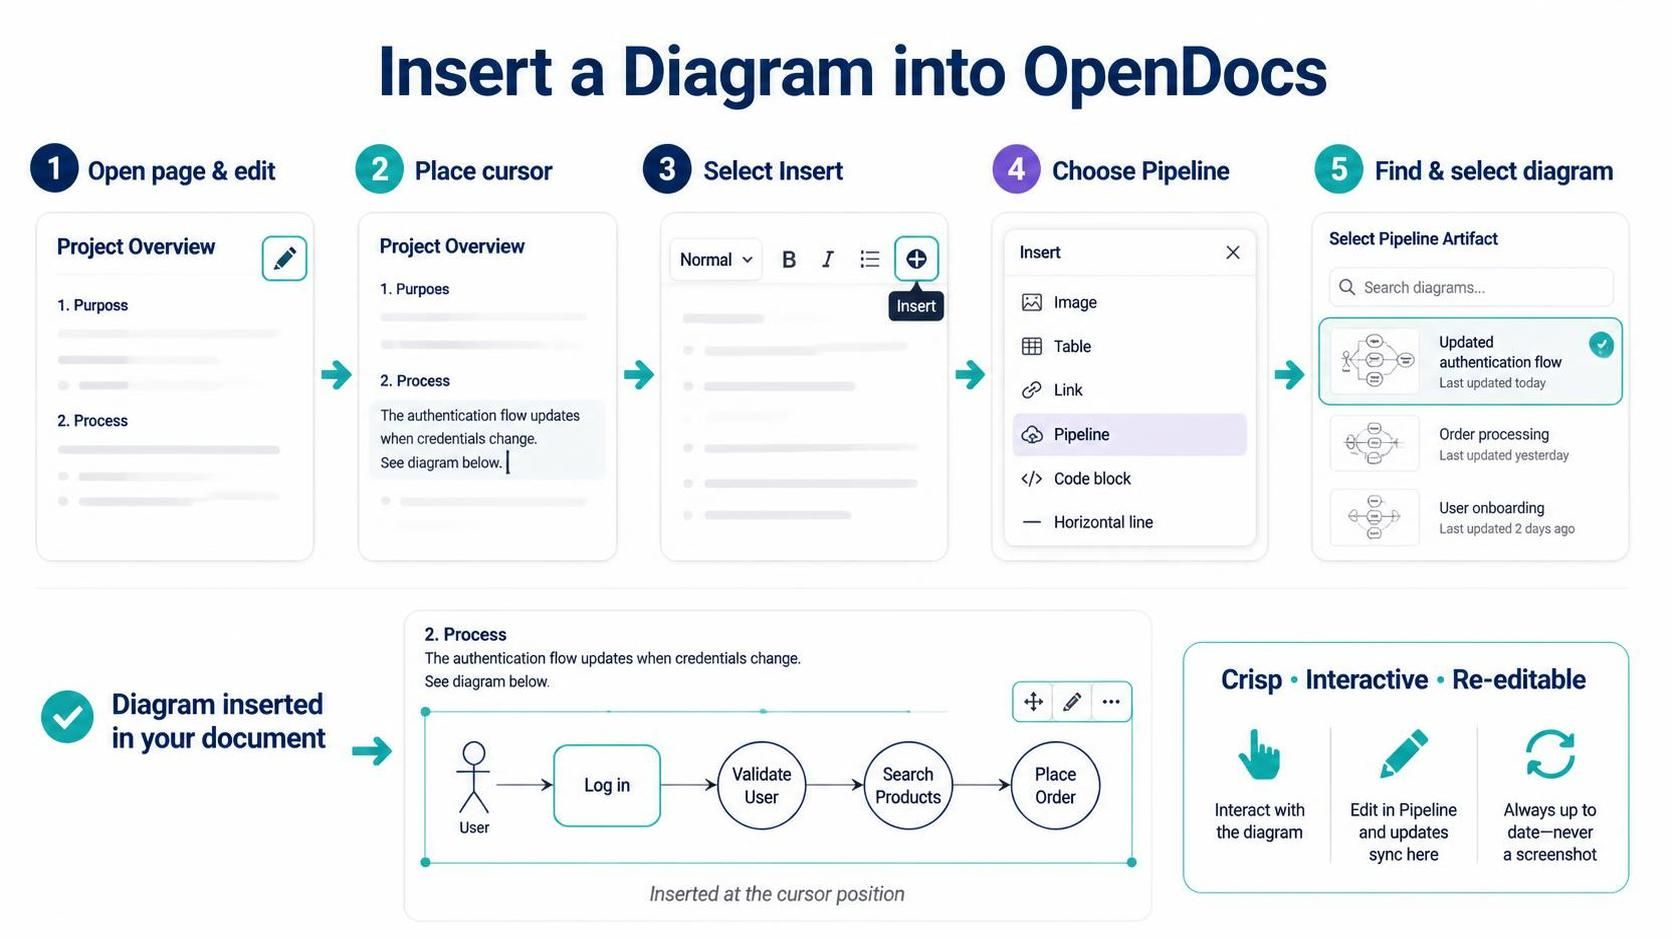
Open the OpenDocs page where the diagram belongs and enter edit mode.
-
Place the cursor at the desired insertion point.
-
Select Insert in the editor toolbar.
-
Choose Pipeline in the insertion window.
-
Find and select the diagram.
The selected diagram is inserted at the cursor position. The review describes it as crisp and interactive, and emphasizes that it can be re-edited rather than treated only as a flat screenshot.
Keep documentation current
When the diagram changes:
-
Update the source diagram in Desktop.
-
Send the revised diagram to the Pipeline using the same workflow.
-
In OpenDocs, select or switch to the latest revision when you update the document.
Use Pipeline comments to explain meaningful changes—for example, “v2: added payment retry path.” That makes it easier for teammates to understand why a new revision exists and which one belongs in the documentation. The article presents revision tracking and updating the embedded diagram as part of the workflow.
Practical habits that make the workflow easier
-
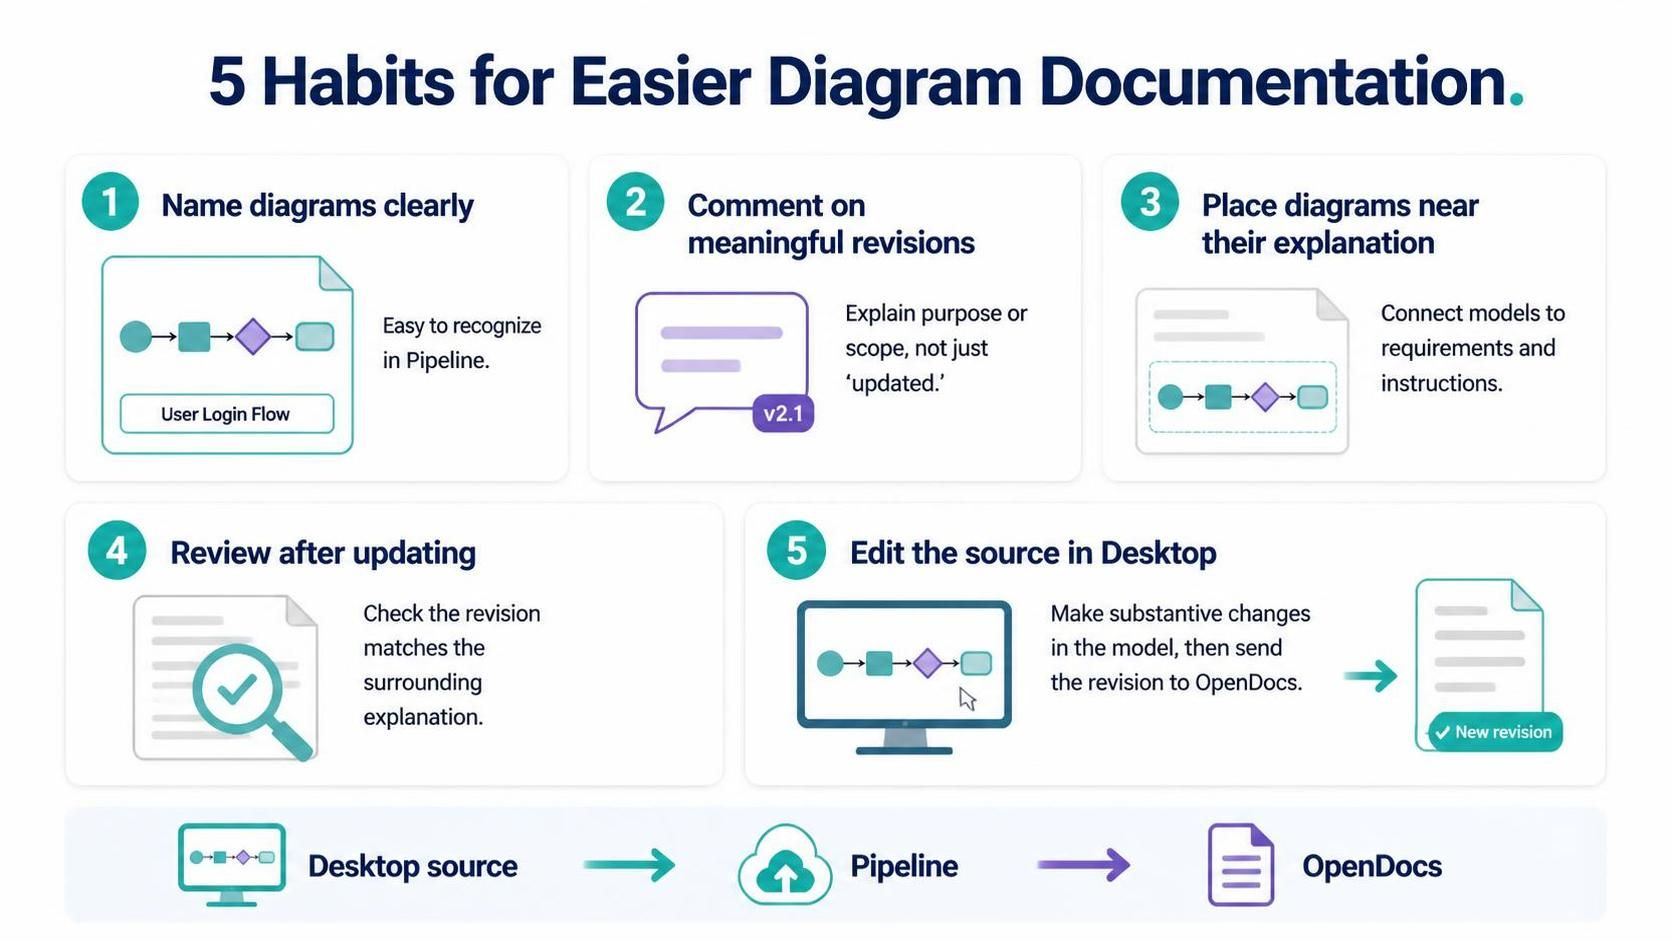
Use descriptive diagram names. Make them easy to recognize in the Pipeline list.
-
Add comments for significant revisions. Include the purpose or scope of the change, not just “updated.”
-
Insert diagrams near the text that explains them. This helps readers connect the model to the relevant requirements or instructions.
-
Review the document after updating an artifact. Check that the chosen revision still matches the surrounding explanation.
-
Keep the source model in Desktop. Treat it as the place to make substantive diagram edits, then send the revision to OpenDocs.
Benefits and trade-offs
The main benefit is a more direct route from modeling to documentation: fewer manual exports, less reformatting, and an easier way to keep diagrams associated with their source and revisions. This is particularly useful for teams maintaining architecture, process, or requirements documentation that changes over time.
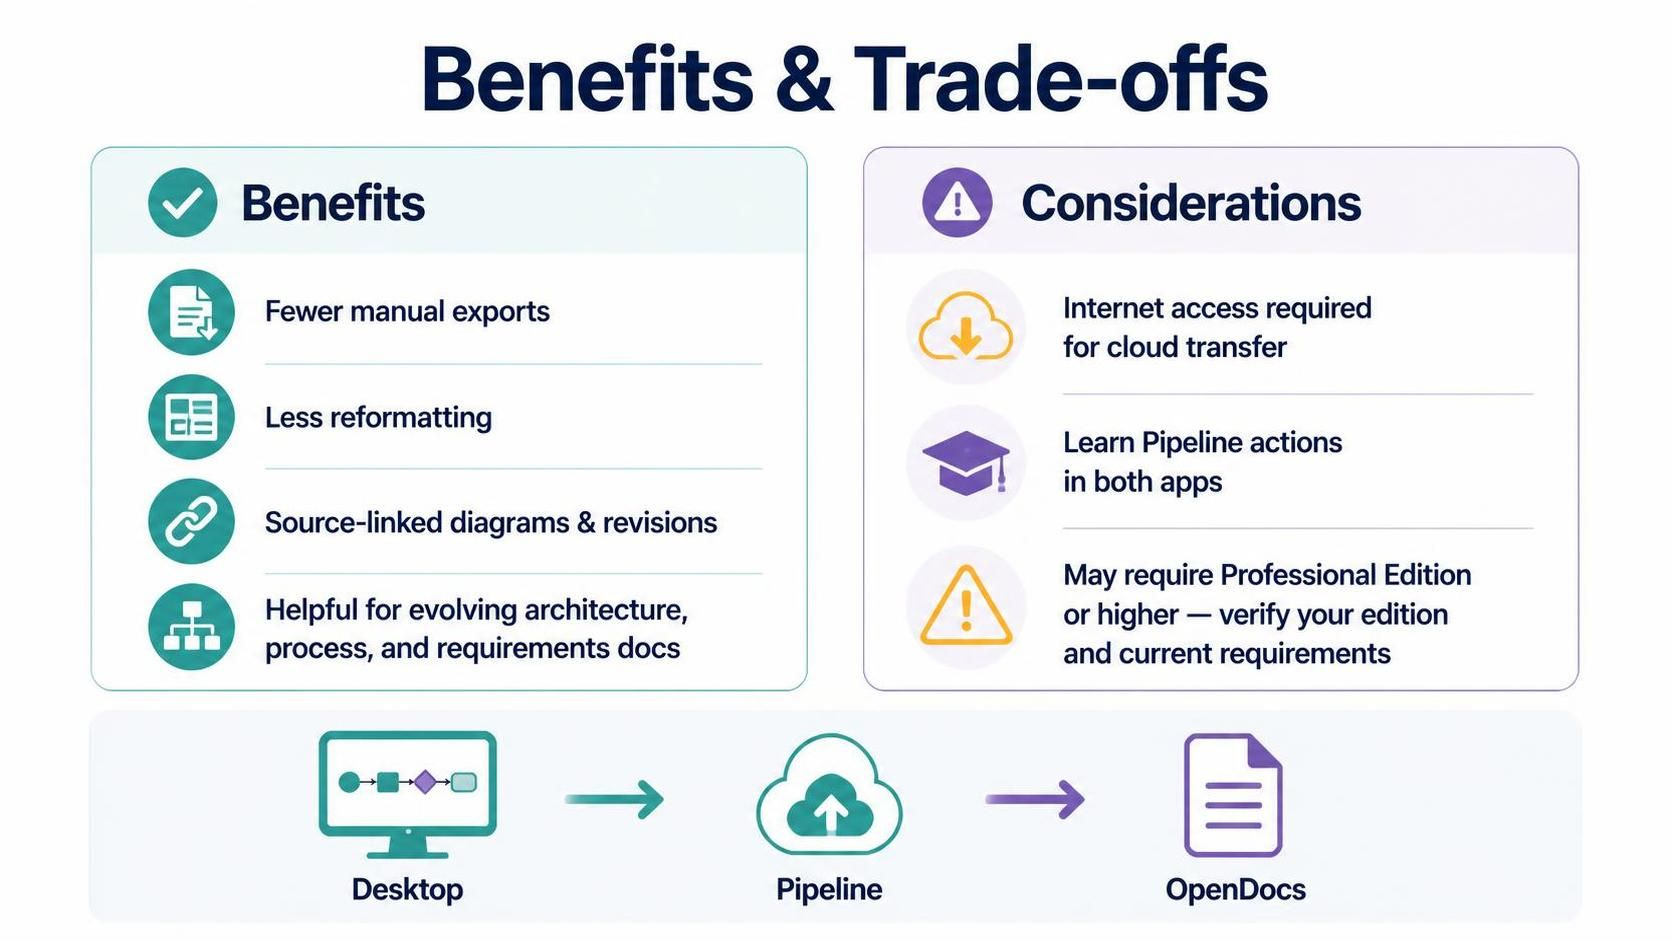
There are a few practical considerations. The workflow depends on internet access for sending artifacts to the cloud, and users need to learn where the Pipeline actions are in both applications. The image’s summary also notes that the feature may require Professional Edition or higher; check your installed edition and current product requirements before planning a rollout.
A simple example
Suppose a team documents a customer-management system:
-
An analyst creates a use-case diagram in Desktop.
-
They send it to the Pipeline with the comment “Initial customer-management use cases.”
-
A technical writer inserts it into the system overview in OpenDocs.
-
Later, the team adds a new account-recovery flow, sends the updated diagram with a revision note, and updates the diagram in the document.
The model and its explanatory text now live in the same documentation workflow, rather than relying on someone to remember to export and replace an image manually.
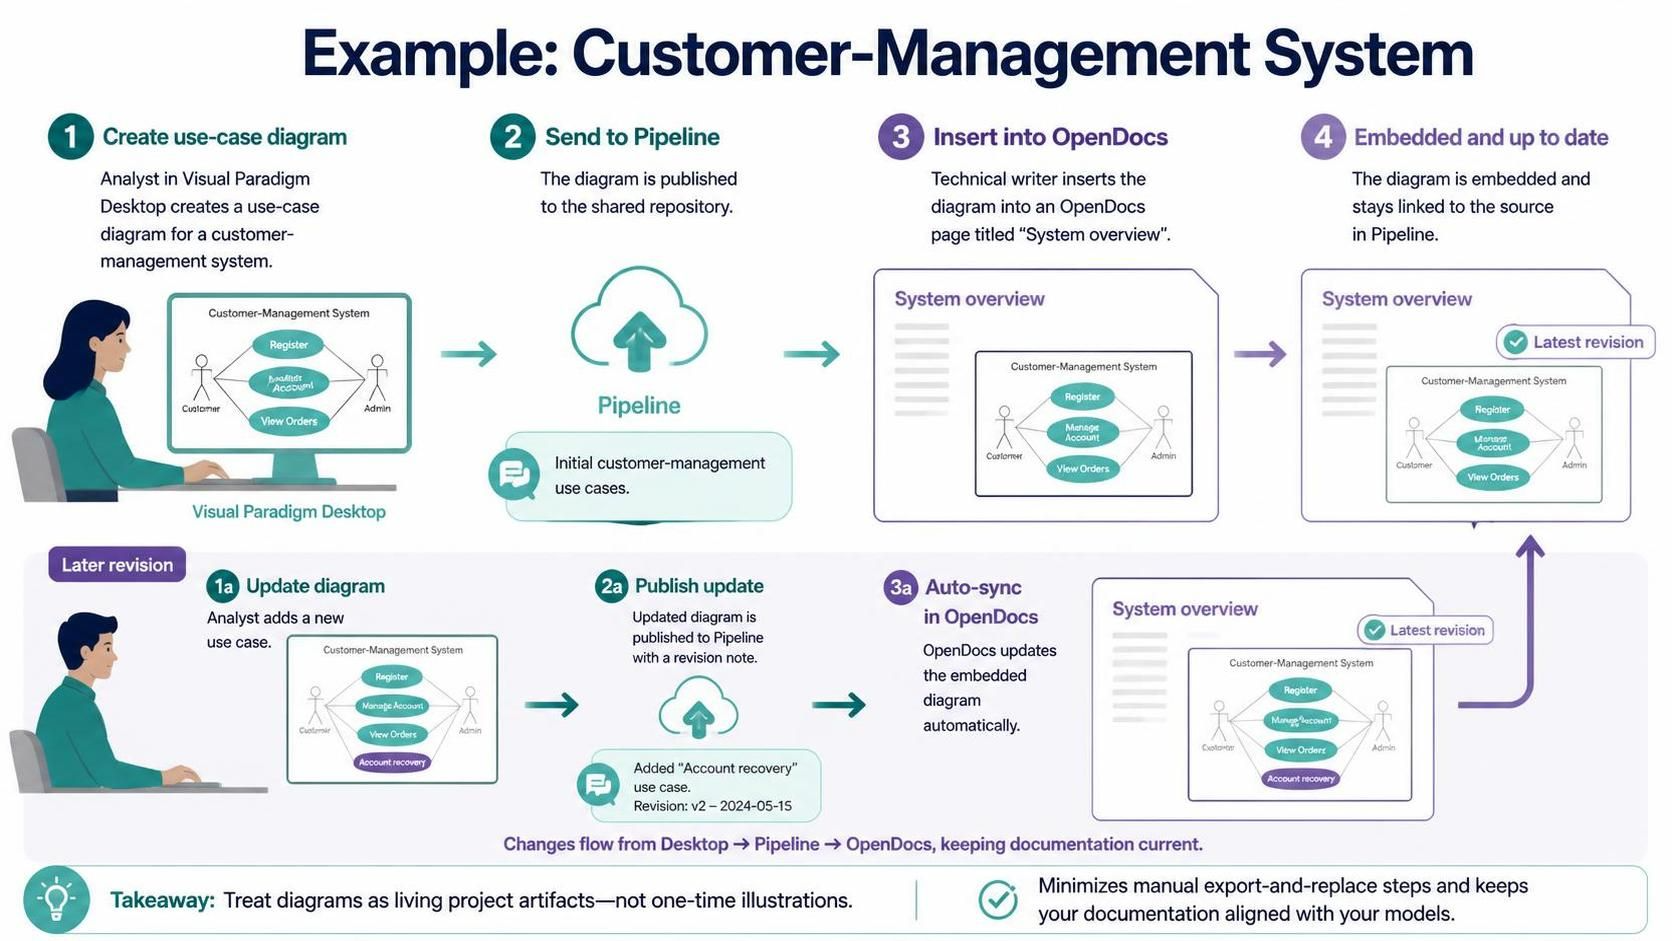
Bottom line: The Desktop-to-OpenDocs Pipeline is most useful when diagrams are living project artifacts—not one-time illustrations. Create and maintain the model in Desktop, use the Pipeline to transfer revisions, and embed the relevant version where readers need it in OpenDocs.

 English
 Arabic
 Chinese (Simplified)
 Dutch
Dutch French
 German
 Italian
 Japanese
 Korean
 Portuguese
 Russian
 Spanish